Welcome to the Ultimate Guide to Repotting Indoor Plants! Whether you’re a seasoned green thumb or just starting out with your indoor garden, understanding when and how to repot your plants is crucial for their health and vitality. In this comprehensive guide, we will delve into the why, when, and how of repotting, equipping you with the knowledge and techniques to ensure your indoor plants thrive.
Stay Tuned For More Insightful Tips And Tricks On Indoor Plant Care In Future Blog Posts
Chapter 1: Understanding the Importance of Repotting :
1.1 The Role of Repotting in Plant Health
Repotting is a crucial aspect of indoor plant care that directly impacts the health and vitality of your green companions. The primary function of repotting is to provide plants with fresh soil and adequate space for root expansion. Over time, potted plants outgrow their containers, exhausting the available nutrients in the soil and becoming root-bound, which hinders their ability to absorb water and nutrients effectively. Repotting ensures that plants have access to essential nutrients, oxygen, and moisture, promoting robust growth and overall well-being.
1.2 Signs Your Indoor Plants Need Repotting
Recognizing when your indoor plants require repotting is essential for maintaining their health and preventing issues such as stunted growth and root rot. Some common signs that indicate it’s time to repot your plants include:
- Roots protruding from drainage holes: When you notice roots emerging from the bottom of the pot, it’s a clear sign that the plant has outgrown its current container and needs more space to grow.
- Slow growth or stunted development: If your plant’s growth has significantly slowed down or its leaves are smaller than usual, it may be struggling due to overcrowded roots.
- Watering more frequently: Plants with compacted roots may require more frequent watering as they struggle to absorb moisture from the soil.
- Soil drying out quickly: When soil dries out rapidly after watering, it could indicate that the plant’s roots have taken up most of the available space, leaving little room for water retention.
Regularly inspecting your plants for these signs will help you determine when it’s time to repot them, ensuring they continue to thrive.
1.3 Benefits of Repotting for Indoor Plants
Repotting offers numerous benefits that contribute to the overall health and vigor of indoor plants:
- Improved nutrient uptake: Fresh potting soil provides plants with essential nutrients, promoting healthy growth and vibrant foliage.
- Enhanced root development: Repotting allows plants to develop a stronger root system by providing them with ample space to spread out and establish themselves.
- Prevention of root-bound conditions: Transplanting plants into larger pots prevents them from becoming root-bound, a condition where roots become tightly packed and unable to access water and nutrients effectively.
- Increased aeration: Repotting aerates the soil, preventing compaction and promoting better drainage, which is crucial for preventing waterlogged conditions that can lead to root rot.
- Stimulated growth: By providing plants with fresh soil and additional space, repotting encourages new growth, resulting in healthier and more robust plants overall.
Chapter 2: Timing: When to Repot Your Indoor Plants :
2.1 Seasonal Considerations
Repotting indoor plants can be influenced by the seasons. In general, the ideal time to repot most indoor plants is during the active growing season, which typically aligns with spring and early summer. During this time, plants are actively growing, and repotting can help accommodate their increasing root systems and promote healthy growth. However, some plants may have specific seasonal preferences based on their natural growth patterns or dormancy periods. It’s essential to research the specific needs of each plant species before deciding on the best time to repot.
2.2 Signs It’s Time to Repot
Knowing when to repot your indoor plants is crucial for their health and well-being. Some common signs that indicate it’s time to repot include:
- Roots circling around the pot’s bottom or poking through drainage holes.
- Soil drying out more quickly than usual, indicating that the plant has outgrown its current pot.
- Stunted growth or yellowing leaves, which may suggest that the plant’s roots are becoming overcrowded and unable to access sufficient nutrients.
- The plant becoming unstable in its pot, tipping over easily due to root overcrowding or uneven growth.
Regularly inspecting your plants for these signs can help you determine when they need repotting to ensure their continued growth and vitality.
2.3 Best Times of Day for Repotting
Choosing the right time of day to repot your indoor plants can contribute to their overall health and reduce stress. Here are some considerations for timing your repotting sessions:
- Morning: Repotting in the morning allows plants to recover and adjust to their new environment during the day when they are naturally more active. It also gives them ample time to absorb water and nutrients, promoting quicker recovery.
- Avoiding Midday: It’s generally advisable to avoid repotting during the hottest part of the day, typically midday, to prevent heat stress and dehydration.
- Late Afternoon or Early Evening: If morning repotting isn’t feasible, late afternoon or early evening can be suitable alternatives. During these times, temperatures are usually cooler, reducing the risk of heat stress, and plants have a chance to adjust before nightfall.
Chapter 3: Essential Tools and Materials for Repotting :
3.1 Choosing the Right Pot
- Size Matters: Discuss the importance of choosing a pot that provides adequate space for the plant’s roots to grow.
- Drainage Holes: Emphasize the necessity of pots with drainage holes to prevent waterlogging and root rot.
- Material Considerations: Compare different materials such as plastic, terracotta, and ceramic, highlighting their advantages and disadvantages.
- Aesthetic Appeal: Touch upon how the pot’s appearance can complement the plant and its surroundings.
3.2 Selecting the Ideal Potting Mix
- Balanced Nutrients: Explain the significance of a well-balanced potting mix containing nutrients essential for plant growth.
- Good Drainage: Stress the importance of a mix that promotes proper drainage to prevent overwatering and root suffocation.
- pH Levels: Briefly discuss the importance of pH-balanced soil for optimal plant health.
- DIY vs. Store-bought: Provide options for readers to either purchase pre-made potting mixes or create their own based on specific plant needs and preferences.
3.3 Additional Tools for Successful Repotting
- Trowel or Scoop: Explain the usefulness of a trowel or scoop for transferring soil and easing the process of repotting.
- Pruning Shears: Highlight the importance of pruning shears for trimming roots and removing dead or damaged foliage during repotting.
- Watering Can or Spray Bottle: Discuss the necessity of watering tools for hydrating the plant after repotting and maintaining moisture levels.
- Gloves: Suggest wearing gloves to protect hands from soil, sharp edges of pots, and potential allergens.
- Protective Eyewear: Optionally, recommend protective eyewear, especially when dealing with prickly or thorny plants.
Chapter 4: Step-by-Step Repotting Techniques :
4.1 Preparing Your Plant for Repotting:
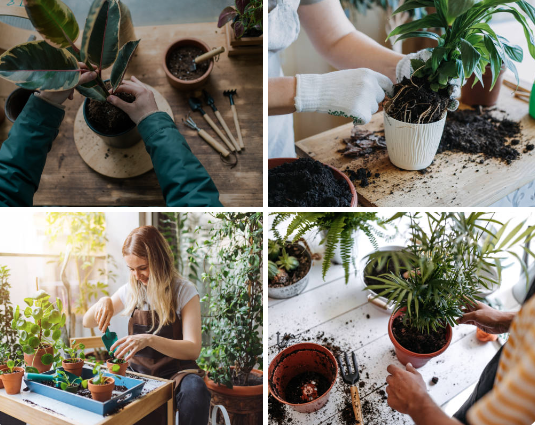
Before starting the repotting process, it’s essential to prepare your plant. This involves watering it thoroughly a day or two before repotting, which helps loosen the soil and reduces stress on the plant. Additionally, remove any dead or yellowing leaves, and inspect the plant for pests or diseases.
4.2 Removing the Plant from Its Current Pot:
Gently tap or squeeze the sides of the pot to loosen the soil and roots. Carefully tip the pot to the side and slide the plant out, supporting the base of the plant with your hand. If the plant is root-bound, meaning the roots have encircled the pot, gently loosen them with your fingers or a tool to promote healthy growth in the new pot.
4.3 Inspecting and Pruning Roots:
Once the plant is out of its pot, inspect the roots for any signs of rot, pests, or disease. Trim away any damaged or rotting roots using sterilized pruning shears. If the plant is severely root-bound, consider gently teasing apart the roots to encourage outward growth.
4.4 Placing the Plant in Its New Pot:
Choose a new pot that is one size larger than the current pot, with drainage holes at the bottom. Add a layer of fresh potting mix to the bottom of the pot. Position the plant in the center of the pot, making sure it sits at the same depth as it did in the previous pot. Adjust the potting mix as needed to ensure the plant is stable.
4.5 Backfilling with Potting Mix:
Once the plant is in place, carefully backfill around the roots with fresh potting mix, gently tamping it down to remove any air pockets. Leave a small gap between the top of the soil and the rim of the pot to allow for watering. Avoid packing the soil too tightly, as this can hinder water drainage and root growth.
4.6 Watering and Settling In:
After repotting, water the plant thoroughly until water drains out of the bottom of the pot. This helps settle the soil and ensures the roots make good contact with the new potting mix. Place the plant in a location with appropriate light and temperature conditions, and avoid fertilizing for a few weeks to allow the plant to adjust to its new environment.
These steps provide a comprehensive guide to successfully repotting your plants, promoting healthy growth and vitality.
Chapter 5: Tips and Tricks for Successful Repotting :
5.1 Avoiding Common Mistakes
Repotting plants can be a delicate process, but with careful attention, you can avoid common mistakes. Here are some tips to ensure a successful repotting:
- Use the right pot size: Ensure that the new pot is only slightly larger than the previous one. Too much space can lead to overwatering and root rot.
- Choose the right soil: Use a well-draining potting mix appropriate for your plant species. Avoid heavy soils that can retain too much moisture.
- Water appropriately: Water your plant a day or two before repotting to make the process easier. After repotting, water lightly and gradually increase watering as the plant adjusts to its new environment.
- Handle roots gently: Avoid damaging the roots during repotting. If the roots are tightly bound, gently loosen them to encourage healthy growth.
- Monitor for signs of stress: Keep an eye on your plant after repotting for signs of stress, such as wilting or yellowing leaves. Adjust care as needed to help the plant recover.
5.2 Dealing with Root-Bound Plants
Root-bound plants occur when the roots outgrow their container, forming a dense mass that can hinder growth. Here’s how to deal with root-bound plants during repotting:
- Gently loosen the roots: If the roots are tightly packed, gently tease them apart to encourage new growth. Be careful not to damage the roots in the process.
- Trim overgrown roots: If the roots are excessively long or circling the pot, trim them with clean scissors or pruning shears. This encourages the plant to develop a more compact root system.
- Repot into a larger container: Choose a new pot that is slightly larger than the previous one to accommodate the root growth. Ensure it has drainage holes to prevent waterlogging.
- Monitor for recovery: After repotting, keep an eye on the plant for signs of stress or shock. Adjust watering and care as needed to help the plant recover.
5.3 Repotting Fragile or Sensitive Plants
Some plants are more sensitive to repotting than others, requiring extra care to minimize stress. Here are tips for repotting fragile or sensitive plants:
- Choose the right time: Repot sensitive plants during their dormant period or when they are least likely to be stressed, such as in early spring or fall.
- Handle with care: Be gentle when handling fragile plants to avoid damaging leaves or stems. Support the plant while removing it from its old pot and transferring it to the new one.
- Minimize root disturbance: Try to disturb the roots as little as possible during repotting. If necessary, gently loosen them rather than aggressively pruning or cutting them.
- Provide optimal conditions: After repotting, place the plant in an appropriate location with the right light, temperature, and humidity levels to help it recover.
5.4 Adjusting Care Routine After Repotting
After repotting, your plant may need some time to adjust to its new environment. Here’s how to adjust your care routine to help the plant thrive:
- Water cautiously: After repotting, water the plant lightly and gradually increase watering as needed. Avoid overwatering, as this can lead to root rot in newly potted plants.
- Monitor for signs of stress: Keep an eye on your plant for signs of stress, such as wilting or yellowing leaves. Adjust watering, lighting, and humidity levels as needed to help the plant recover.
- Avoid fertilizing immediately: Hold off on fertilizing newly repotted plants for a few weeks to give them time to settle into their new pot. Once the plant shows signs of new growth, resume fertilizing with a diluted solution.
- Be patient: It may take some time for your plant to adjust to its new pot, so be patient and provide consistent care while it acclimates to its new environment.
Chapter 6: Specialty Repotting Techniques :
6.1 Repotting Succulents and Cacti:
- Succulents and cacti require specific care during repotting due to their unique water storage capabilities and root structures.
- Use well-draining soil to prevent root rot, as these plants are susceptible to overwatering.
- When repotting succulents and cacti, gently remove them from their old container and shake off excess soil to expose the roots.
- Inspect the roots for any signs of rot or damage and trim as necessary with sterilized tools.
- Allow the plants to dry for a day or two before placing them in their new pot with fresh, well-draining soil.
- Avoid watering newly repotted succulents and cacti for a few days to allow them to acclimate to their new environment.
6.2 Orchid Repotting:
- Orchids have unique epiphytic roots that require proper air circulation and drainage.
- Repot orchids when they outgrow their current container or when the potting medium breaks down.
- Choose a pot with adequate drainage holes and a specialized orchid potting mix consisting of bark, sphagnum moss, and perlite.
- Carefully remove the orchid from its old pot and trim any dead or rotting roots.
- Place the orchid in the new pot, ensuring that the roots are spread out evenly and have room to grow.
- Water the orchid thoroughly after repotting, allowing excess water to drain away completely.
- Keep the orchid in a warm, humid environment with indirect sunlight while it adjusts to its new pot.
6.3 Ferns, Bromeliads, and Other Unique Plants:
- Ferns and bromeliads have specific requirements for repotting due to their delicate root systems and unique growth habits.
- Use a well-aerated potting mix that retains moisture but drains well for ferns and bromeliads.
- When repotting ferns, gently loosen the root ball and remove any dead or damaged fronds before placing them in the new container.
- Bromeliads often grow in soil-less media or mounted on substrates like bark or cork, so take care not to damage their roots during repotting.
- Other unique plants may have specialized needs depending on their species, so research their specific requirements before repotting.
- After repotting, water the plants thoroughly and provide appropriate environmental conditions to encourage healthy growth and acclimation.
These specialty repotting techniques cater to the unique needs of succulents, cacti, orchids, ferns, bromeliads, and other distinctive plants, ensuring their continued health and vitality in their new containers.
Chapter 7: Troubleshooting Common Issues After Repotting :
7.1 Signs of Transplant Shock
Transplant shock refers to the stress experienced by plants after being transplanted from one environment to another. This stress can impede the plant’s growth and health, sometimes resulting in noticeable symptoms.
Symptoms: Common signs of transplant shock include wilting, where the plant’s leaves droop and appear limp. Yellowing leaves, often starting from the bottom of the plant, can also indicate shock. Additionally, the plant may exhibit stunted growth or leaf loss. These symptoms typically occur within a few days to weeks after transplantation.
Causes: Several factors contribute to transplant shock:
- Root Disturbance: When plants are removed from their original growing medium, their root systems are often disturbed, leading to damage or breakage of delicate roots. This disruption can hinder the plant’s ability to absorb water and nutrients.
- Environmental Changes: Moving a plant to a new location exposes it to different environmental conditions, such as temperature, humidity, and light levels. These changes can stress the plant as it adjusts to its new surroundings.
- Water Stress: Inadequate watering during or after transplantation can exacerbate shock. Both overwatering and underwatering can disrupt the plant’s ability to regulate water uptake and lead to stress.
- Nutrient Imbalance: Soil composition may differ between the original and new planting locations, affecting nutrient availability to the plant. A lack of essential nutrients can weaken the plant and contribute to shock.
Treatment: To mitigate transplant shock and help the plant recover, consider the following strategies:
- Watering: Ensure the plant receives sufficient water, but avoid overwatering, which can suffocate roots. Monitor soil moisture levels and water when the top inch of soil feels dry.
- Light Exposure: Gradually introduce the plant to its new light conditions to prevent sunburn or light stress. Provide appropriate shade if necessary, especially for delicate or sun-sensitive plants.
- Nutrient Support: Consider supplementing the soil with a balanced fertilizer to provide essential nutrients and support the plant’s recovery.
- Reduce Stressors: Minimize additional stressors such as extreme temperatures, strong winds, or pest infestations during the recovery period.
- Pruning: Trim damaged or wilted foliage to redirect the plant’s energy towards new growth and reduce strain on the root system.
- Patience: Allow the plant time to acclimate to its new environment. Most plants will gradually recover from transplant shock with proper care and patience.
7.2 Dealing with Overwatering or Underwatering
Identifying Overwatering:
- Yellowing Leaves: One of the most common signs of overwatering is when the leaves of your plant start turning yellow. This happens because excess water in the soil limits oxygen availability to the roots, causing them to suffocate and resulting in yellow leaves.
- Mold Growth: Overwatered soil creates a perfect environment for mold and fungi to thrive. If you notice fuzzy white mold growth on the soil surface or on the plant itself, it’s a clear indication of overwatering.
- Root Rot: If you gently tug on your plant and find that it’s loose in the soil or if you notice a foul odor coming from the roots, it’s likely suffering from root rot caused by overwatering.
Corrective Measures for Overwatering:
- Adjust Watering Frequency: Allow the soil to dry out between waterings. Stick your finger about an inch into the soil; if it feels dry, it’s time to water. Avoid a strict watering schedule and instead water only when necessary.
- Improve Drainage: Ensure your plant pots have proper drainage holes at the bottom. Consider repotting your plant into a container with better drainage or adding gravel or perlite to the soil mix to improve aeration and drainage.
Identifying Underwatering:
- Dry, Crispy Leaves: When a plant is underwatered, its leaves become dry, crispy, and may start to curl at the edges. This happens because the plant is losing moisture faster than it can absorb it from the soil.
- Slow Growth: Underwatered plants often exhibit stunted or slow growth as they struggle to acquire enough water for photosynthesis and other essential processes.
Corrective Measures for Underwatering:
- Adjust Watering Frequency: Increase the frequency of watering sessions, ensuring that the soil remains consistently moist but not waterlogged. Be mindful not to overcompensate and flood the plant.
- Provide Adequate Hydration: Consider misting the leaves or placing the plant pot on a pebble tray filled with water to increase humidity levels around the plant. Ensure the plant is receiving enough water without causing waterlogging.
7.3 Addressing Pest Infestations Post-Repotting
- Aphids: These small, soft-bodied insects often cluster on new growth, sucking sap from plants and causing distortion or yellowing of leaves.
- Spider Mites: These tiny arachnids are often found on the undersides of leaves, where they feed on plant fluids and create fine webbing. Infested leaves may appear stippled or discolored.
- Fungus Gnats: These small flies are attracted to moist potting soil and lay their eggs there. Larvae feed on organic matter and plant roots, potentially causing damage to young plants.
- Mealybugs: These soft-bodied, white insects are often found in leaf axils or on stems, sucking plant juices and excreting sticky honeydew that can lead to sooty mold growth.
- Scale Insects: These tiny, immobile pests attach themselves to stems or leaves and feed on plant sap. They often appear as small, raised bumps and can cause leaf yellowing or stunted growth.
Identification:
- Visual inspection: Look for signs of pests such as clusters of insects, webbing, distorted leaves, or sticky residue on plant surfaces.
- Symptom recognition: Symptoms may include yellowing or wilting leaves, stippling or discoloration, sticky or moldy residue on leaves, or a decline in plant health despite proper care.
Treatment:
- Natural remedies: Use methods such as spraying plants with a mixture of water and mild soap, introducing beneficial insects like ladybugs or predatory mites, or applying neem oil, which disrupts pest growth and feeding.
- Insecticidal soaps: These specially formulated soaps can be sprayed on affected plants to suffocate and kill pests like aphids, spider mites, and mealybugs.
- Commercial pesticides: Consider using chemical pesticides as a last resort, following label instructions carefully and avoiding use on edible plants whenever possible.
Prevention:
- Quarantine new plants: Keep newly acquired plants separate from your existing collection for a few weeks to monitor for signs of pests before introducing them.
- Maintain plant health: Provide proper watering, light, and nutrient levels to keep plants healthy and more resilient to pest infestations.
- Regular monitoring: Inspect plants regularly for signs of pests or damage, especially after repotting or bringing plants indoors for the winter. Early detection can prevent infestations from spreading.
Chapter 8: Long-Term Care After Repotting :
8.1 Monitoring Growth and Health
After repotting your plant, it’s crucial to closely monitor its growth and overall health. This involves observing changes in leaf color, size, and texture, as well as checking for signs of pests or diseases. Regularly inspecting your plant allows you to address any issues promptly and ensure it continues to thrive in its new environment.
8.2 Fertilizing Schedule After Repotting
Establishing an appropriate fertilizing schedule is essential for the long-term health of your repotted plant. Depending on the type of plant and its specific needs, you may need to adjust the frequency and type of fertilizer used. Generally, it’s recommended to wait a few weeks after repotting before applying fertilizer to allow the plant to acclimate to its new soil. Once you begin fertilizing, stick to a consistent schedule to provide your plant with the nutrients it requires for optimal growth.
8.3 Repotting Frequency and Maintenance
While repotting is necessary for maintaining the health of your plant, it’s essential to understand the appropriate frequency and techniques for repotting. Factors such as the type of plant, its growth rate, and the size of its root system will influence how often repotting is needed. Additionally, regular maintenance tasks such as pruning roots, refreshing soil, and providing adequate drainage are crucial for ensuring your plant’s continued well-being.
Chapter 9: Frequently Asked Questions About Repotting Indoor Plants :
9.1 How Often Should I Repot My Indoor Plants?
Repotting frequency depends on various factors such as the plant species, growth rate, and pot size. Generally, it’s recommended to repot indoor plants every 1-2 years to prevent them from becoming root-bound. Signs that your plant may need repotting include roots growing out of the drainage holes, stunted growth, or the plant becoming unstable in its pot.
9.2 Can I Repot a Plant That Is Flowering?
It’s generally best to avoid repotting a plant while it’s flowering, if possible. Repotting can be stressful for plants, and disrupting their growth cycle while they’re flowering may cause them to drop their flowers prematurely. However, if repotting is absolutely necessary due to root bound conditions or other issues, do it with caution, ensuring minimal disturbance to the roots and providing appropriate care post-repotting.
9.3 What If My Plant Has Outgrown Its Pot But It’s Not the Right Time to Repot?
If your plant has outgrown its pot but repotting isn’t ideal at the moment (e.g., it’s in the middle of its growing season), you can consider other options to manage its growth temporarily. You could prune back excessive growth to reduce the plant’s size or gently loosen and remove some of the outer roots without completely repotting it. Another option is to simply place the plant in a slightly larger container without disturbing the roots too much, though this should be done with caution to avoid overpotting, which can lead to issues like waterlogging and root rot. Remember to monitor the plant closely and provide appropriate care until it’s the right time for repotting.
In Conclusion, mastering the art of repotting indoor plants is essential for nurturing a thriving indoor garden. By understanding the timing, techniques, and tools involved, you can ensure that your plants continue to flourish and bring beauty into your home. Remember, each plant has its own unique needs, so observe and adapt as you cultivate your own indoor jungle.
By following the tips and techniques outlined in this guide, you’ll be well-equipped to tackle any repotting challenge that comes your way. Here’s to happy, healthy indoor plants and a greener, more vibrant living space!

