Indoor plants bring life and vibrancy into our homes, purifying the air and adding a touch of nature to our living spaces. Propagation is a rewarding way to expand your indoor garden without purchasing new plants. However, successful propagation requires attention to detail and avoiding common mistakes. In this blog, I will share my personal experiences and insights, backed by research, to help you master the art of indoor plant propagation.

Stay Tuned For More Insightful Tips And Tricks On Indoor Plant Care In Future Blog Posts
Understanding Plant Propagation :
Plant propagation is the process of growing new plants from a variety of sources: seeds, cuttings, bulbs, and other plant parts. This practice not only helps in multiplying your plant collection but also allows you to share your favorite plants with friends and family. There are two main types of propagation: sexual (through seeds) and asexual (through cuttings, division, layering, etc.). Each method has its unique set of techniques and challenges.
Sexual Propagation
Sexual propagation involves the fertilization of the ovule by pollen, leading to the production of seeds. This method is common for flowering plants and can result in new plant varieties due to genetic variation.
Asexual Propagation
Asexual propagation, also known as vegetative propagation, involves growing new plants from the vegetative parts of the parent plant, such as stems, leaves, and roots. This method produces clones of the parent plant, ensuring that the new plants have the same characteristics.
Common Mistakes to Avoid in Plant Propagation :
- Improper Cutting Techniques
- Using the Wrong Medium
- Inadequate Light Conditions
- Overwatering or Underwatering
- Ignoring Plant Hygiene
- Choosing the Wrong Time for Propagation
- Neglecting Humidity and Temperature Needs
- Lack of Patience
- Not Sterilizing Tools
- Overcrowding Cuttings
1. Improper Cutting Techniques
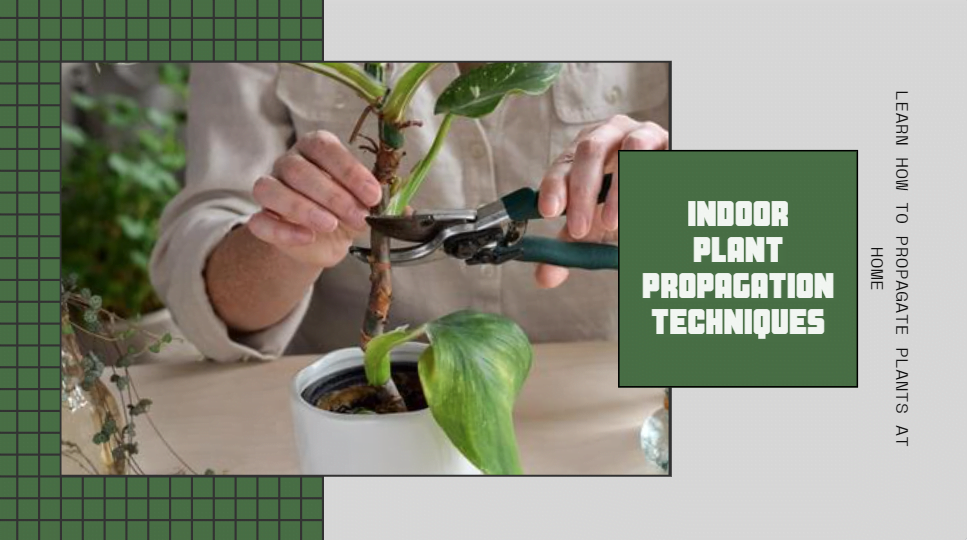
One of the most common mistakes is making improper cuts when taking cuttings from the parent plant. The cutting should be clean and precise, using a sharp, sterilized knife or scissors. A jagged or torn cut can damage the plant and reduce the chances of successful rooting.
Tip: When taking a stem cutting, ensure that you cut just below a node (the point where leaves attach to the stem) and include at least two nodes on the cutting. Remove any lower leaves that might be submerged in water or soil to prevent rot.
2. Using the Wrong Medium
The medium in which you place your cuttings plays a crucial role in their success. Different plants have different requirements. Using the wrong medium can lead to poor root development or fungal issues.
Tip: For most cuttings, a well-draining soil mix or a combination of perlite and peat moss works well. Some plants, like succulents, prefer a sandy mix. Research the specific needs of your plant to choose the right medium.
3. Inadequate Light Conditions
Light is essential for the photosynthesis process, which is crucial for root and leaf development. However, the intensity and duration of light can vary depending on the plant species.
Tip: Place your cuttings in a bright, indirect light spot. Avoid direct sunlight as it can scorch the tender cuttings. If natural light is insufficient, consider using grow lights to provide the necessary light spectrum.
4. Overwatering or Underwatering
Finding the right balance in watering is one of the trickiest aspects of plant propagation. Overwatering can lead to root rot, while underwatering can cause the cuttings to dry out and fail to root.
Tip: Keep the medium consistently moist but not waterlogged. Check the moisture level regularly and adjust your watering routine accordingly. For water propagation, change the water every few days to prevent stagnation.
5. Ignoring Plant Hygiene
Neglecting hygiene can introduce diseases and pests to your cuttings, hindering their growth or killing them altogether.
Tip: Always use sterilized tools when taking cuttings. Ensure the pots or containers you use are clean. If you’re reusing pots, disinfect them with a mild bleach solution to remove any pathogens.
6. Choosing the Wrong Time for Propagation
Timing can significantly impact the success of plant propagation. Some plants root better during specific seasons or stages of their growth cycle.
Tip: Spring and early summer are generally the best times for propagation, as plants are in their active growth phase. Avoid taking cuttings during the plant’s dormant period, typically in late fall and winter.
7. Neglecting Humidity and Temperature Needs
Cuttings often require higher humidity levels to prevent moisture loss until they develop roots. Similarly, maintaining an appropriate temperature range is vital for root formation.
Tip: Use a humidity dome or a clear plastic bag to cover your cuttings and retain moisture. Place the cuttings in a warm area, ideally between 70-75°F (21-24°C), to encourage root growth.
8. Lack of Patience
Propagation is a slow process, and it can be tempting to check on the progress of your cuttings frequently. However, disturbing the cuttings too often can hinder their development.
Tip: Be patient and give your cuttings time to root. Avoid pulling them out to check for roots. Instead, look for signs of new growth, which indicates successful rooting.
9. Not Sterilizing Tools
Using unsterilized tools can introduce bacteria, fungi, and viruses to your cuttings, leading to infections and failure.
Tip: Always sterilize your cutting tools with alcohol or a bleach solution before and after use. This practice helps prevent the spread of pathogens and ensures the health of your plants.
10. Overcrowding Cuttings
Placing too many cuttings in one container can lead to competition for resources and increase the risk of disease spread.
Tip: Space your cuttings adequately to ensure they have enough air circulation and access to nutrients. If using a propagation tray, use cell inserts to keep the cuttings separate.
Detailed Tips for Successful Plant Propagation :
Research Insights
Several studies have been conducted to understand the best practices for plant propagation. For instance, a study by the University of Florida highlighted the importance of hormone treatments in enhancing root formation in cuttings (Kester et al., 2017). Another research from the Royal Horticultural Society emphasized the role of light and temperature in the success rates of different propagation methods (RHS, 2019).
Tip 1: Use Rooting Hormones
Rooting hormones can significantly increase the success rate of your cuttings by promoting root development. These hormones, available in powder, liquid, or gel form, provide the necessary auxins to stimulate root growth.
Application: Dip the cut end of your cutting into the rooting hormone before planting it in the medium. Ensure you tap off any excess hormone to avoid overdosing.
Tip 2: Choose the Right Plant Part
Different plants propagate best from different parts. For example, some plants root easily from stem cuttings, while others may require leaf cuttings, root division, or even air layering.
Research Example: Aloe vera, for instance, propagates best from offsets (pups) that grow at the base of the plant. On the other hand, Pothos (Epipremnum aureum) roots readily from stem cuttings with nodes.
Tip 3: Maintain Optimal Conditions
Each plant has its own preferred conditions for successful propagation. Understanding these requirements and replicating them can greatly improve your success rates.
Temperature and Humidity: Use a humidity dome or plastic bag to maintain high humidity levels around the cuttings. Keep the cuttings in a warm place, but avoid extreme temperatures.
Light: Place the cuttings in bright, indirect light. For low-light plants, adjust the light levels accordingly to prevent stress.
Tip 4: Monitor for Pests and Diseases
Cuttings are vulnerable to pests and diseases, which can quickly spread and cause failure.
Preventive Measures: Regularly inspect your cuttings for signs of pests or disease. Use natural remedies or appropriate pesticides to address any issues promptly.
Tip 5: Gradual Acclimatization
Once your cuttings have rooted, it’s essential to gradually acclimatize them to their new environment to prevent shock.
Process: Gradually expose the new plants to lower humidity levels and more light over a period of days to weeks. This transition helps them adapt without experiencing stress.
Propagating Common Indoor Plants: Step-by-Step Guides :
Pothos (Epipremnum aureum)
Pothos is a popular houseplant known for its trailing vines and heart-shaped leaves. It’s also one of the easiest plants to propagate.
Materials Needed:
- Healthy pothos plant
- Sharp, sterilized scissors
- Small pot with well-draining soil
- Water container (optional)
Steps:
- Select a Stem: Choose a healthy stem with at least 3-4 leaves.
- Cut Below a Node: Using sterilized scissors, cut the stem just below a node.
- Remove Lower Leaves: Remove the lower leaves to leave at least one node bare.
- Rooting in Water or Soil:
- Water Method: Place the cutting in a container of water, ensuring the node is submerged. Change the water every few days.
- Soil Method: Plant the cutting in a small pot with well-draining soil. Water lightly to keep the soil moist.
- Wait for Roots: Place the cutting in bright, indirect light. Roots should develop in 2-4 weeks.
- Transplant: Once roots are a few inches long, transplant the cutting into a larger pot.
Spider Plant (Chlorophytum comosum)
Spider plants are known for their ease of care and ability to produce numerous offshoots (spiderettes).
Materials Needed:
- Healthy spider plant
- Sharp, sterilized scissors
- Small pot with well-draining soil
Steps:
- Identify Spiderettes: Look for spiderettes (baby plants) hanging from the parent plant.
- Cut the Spiderettes: Using sterilized scissors, cut the spiderettes from the parent plant.
- Planting: Plant the spiderettes in a small pot with well-draining soil.
- Watering: Water the new plant lightly, keeping the soil moist but not waterlogged.
- Placement: Place the pot in bright, indirect light. New roots should develop in a few weeks.
Succulents
Succulents are popular for their unique shapes and low maintenance requirements. They can be propagated from leaves or stem cuttings.
Materials Needed:
- Healthy succulent plant
- Sharp, sterilized scissors or knife
- Well-draining soil mix
- Tray or shallow container
Steps:
- Select Healthy Leaves or Stems: Choose a healthy leaf or stem from the parent plant.
- Cut or Twist Off: Gently twist off a leaf or cut a stem using sterilized scissors or a knife.
- Allow to Callus: Let the cuttings sit in a dry place for a few days to callus over. This step prevents rot when planted.
- Planting: Place the callused cuttings on top of a well-draining soil mix.
- Watering: Mist the soil lightly until roots develop. Avoid overwatering.
- Placement: Keep the cuttings in bright, indirect light. Roots should form in a few weeks.
In-Depth Case Studies of Popular Indoor Plants :
Monstera Deliciosa
Monstera Deliciosa, also known as the Swiss cheese plant, is a favorite among indoor gardeners for its large, distinctive leaves.
Materials Needed:
- Healthy Monstera plant
- Sharp, sterilized knife or scissors
- Rooting hormone (optional)
- Pot with well-draining soil
- Plastic bag or humidity dome
Steps:
- Select a Stem Cutting: Choose a stem with at least one leaf and an aerial root.
- Cut Below the Aerial Root: Using sterilized scissors, cut the stem just below the aerial root.
- Rooting Hormone: Dip the cut end in rooting hormone to encourage root growth (optional).
- Planting: Plant the cutting in a pot with well-draining soil. Ensure the aerial root is buried in the soil.
- Humidity and Light: Cover the cutting with a plastic bag or humidity dome to retain moisture. Place in bright, indirect light.
- Watering: Keep the soil consistently moist but not waterlogged.
- Root Development: Roots should develop in 4-6 weeks. Once established, remove the plastic bag and care for the plant as usual.
Fiddle Leaf Fig (Ficus lyrata)
Fiddle Leaf Figs are known for their large, glossy leaves and can be a bit challenging to propagate, but with the right approach, it can be done successfully.
Materials Needed:
- Healthy Fiddle Leaf Fig plant
- Sharp, sterilized knife or scissors
- Rooting hormone
- Pot with well-draining soil
- Plastic bag or humidity dome
Steps:
- Select a Healthy Branch: Choose a healthy branch with at least one node and one leaf.
- Cut Below a Node: Using sterilized scissors, cut the branch just below a node.
- Rooting Hormone: Dip the cut end in rooting hormone to stimulate root growth.
- Planting: Plant the cutting in a pot with well-draining soil, ensuring the node is buried in the soil.
- Humidity and Light: Cover with a plastic bag or humidity dome to maintain high humidity. Place in bright, indirect light.
- Watering: Keep the soil moist but not waterlogged.
- Root Development: Roots should develop in 4-8 weeks. Gradually acclimate the new plant to lower humidity levels.
Snake Plant (Sansevieria trifasciata)
Snake Plants are resilient and easy to propagate, making them ideal for beginners.
Materials Needed:
- Healthy Snake Plant
- Sharp, sterilized knife or scissors
- Well-draining soil mix
- Tray or shallow container
Steps:
- Select a Leaf: Choose a healthy leaf from the parent plant.
- Cut the Leaf: Using sterilized scissors, cut the leaf into 3-4 inch sections. Ensure each section has a clear top and bottom.
- Allow to Callus: Let the cut sections sit for a few days to callus over.
- Planting: Place the callused sections upright in a well-draining soil mix, with the bottom end buried in the soil.
- Watering: Water lightly and keep the soil moist but not waterlogged.
- Placement: Place in bright, indirect light. Roots should develop in 4-6 weeks.
Advanced Propagation Techniques :
Air Layering
Air layering is a method used for plants that are difficult to root from cuttings. It involves encouraging roots to grow on a stem while it is still attached to the parent plant.
Materials Needed:
- Healthy plant
- Sharp, sterilized knife
- Sphagnum moss
- Plastic wrap
- Twist ties or string
Steps:
- Select a Healthy Stem: Choose a stem that is mature and healthy.
- Make a Cut: Using a sterilized knife, make a cut halfway through the stem, about 12-18 inches from the tip.
- Apply Rooting Hormone: Apply rooting hormone to the cut area (optional).
- Wrap with Moss: Soak sphagnum moss in water and wrap it around the cut.
- Cover with Plastic Wrap: Secure the moss with plastic wrap, ensuring it is airtight. Use twist ties or string to hold it in place.
- Wait for Roots: Roots should develop in 4-8 weeks. Once roots are visible through the plastic wrap, cut the stem below the new root ball and plant it in soil.
Grafting
Grafting involves joining two plants together so that they grow as one. This technique is commonly used for fruit trees but can also be applied to some indoor plants.
Materials Needed:
- Rootstock (the plant to which another is grafted)
- Scion (the plant part to be grafted onto the rootstock)
- Sharp, sterilized knife
- Grafting tape or rubber bands
Steps:
- Select Compatible Plants: Choose a healthy rootstock and scion that are compatible.
- Make the Cuts: Using a sterilized knife, make a slanting cut on both the rootstock and scion.
- Join the Cuts: Match the cut surfaces of the rootstock and scion, ensuring they fit snugly together.
- Secure the Graft: Wrap the graft with grafting tape or rubber bands to hold it in place.
- Care for the Graft: Keep the grafted plant in a warm, humid environment. Monitor for growth, and once the graft has taken, remove the tape.
Troubleshooting Common Propagation Problems :
Yellowing Leaves
Cause: Overwatering, poor drainage, or insufficient light. Solution: Check the soil moisture level and ensure proper drainage. Adjust the light conditions to provide bright, indirect light.
Mold Growth
Cause: High humidity and poor air circulation. Solution: Improve air circulation around the cuttings. Reduce humidity levels slightly and ensure the medium is not too wet.
Slow or No Root Development
Cause: Insufficient light, improper temperature, or lack of rooting hormone. Solution: Increase light levels using grow lights if necessary. Ensure the temperature is within the optimal range for the plant. Use rooting hormone to stimulate root growth.
Cuttings Rotting
Cause: Overwatering or not allowing the cut end to callus.
Solution: Allow the cuttings to callus before planting. Reduce watering and ensure the medium is well-draining.
Plant propagation is a rewarding and enjoyable practice that allows you to expand your plant collection and share your passion with others. By avoiding common mistakes and following the tips outlined in this guide, you can increase your chances of success and enjoy the process. Remember, patience and attention to detail are key. Happy propagating!


